Install ArgoUML on Linux
Download ArgoUML-0.34.tar.gz from the site given

Downloaded file

Extract it into /opt folder
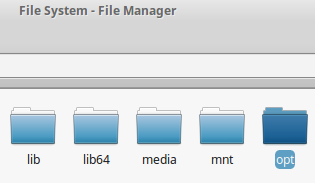
If extraction not permitted on ur /opt , give rw permission using the following command
sudo chmod a+rw /opt
Then you can extract into opt folder

----------------------------------------------------------------------------------------------------------------------------
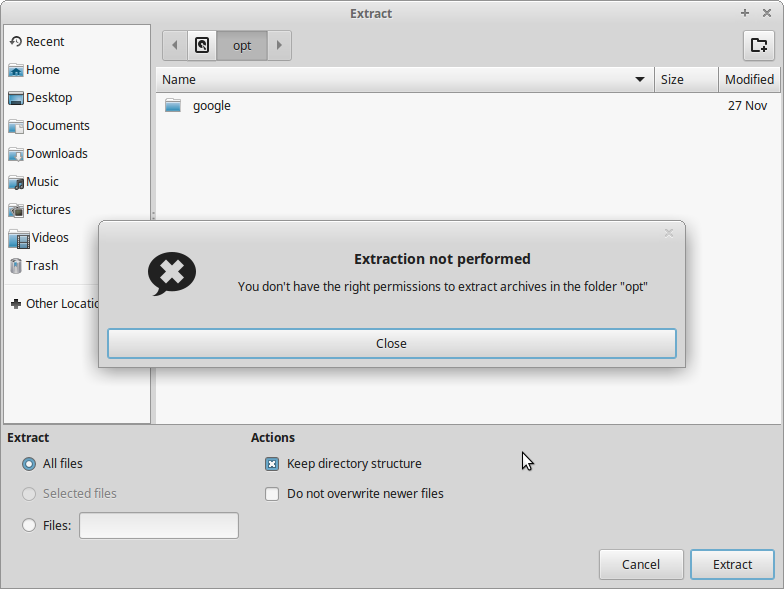
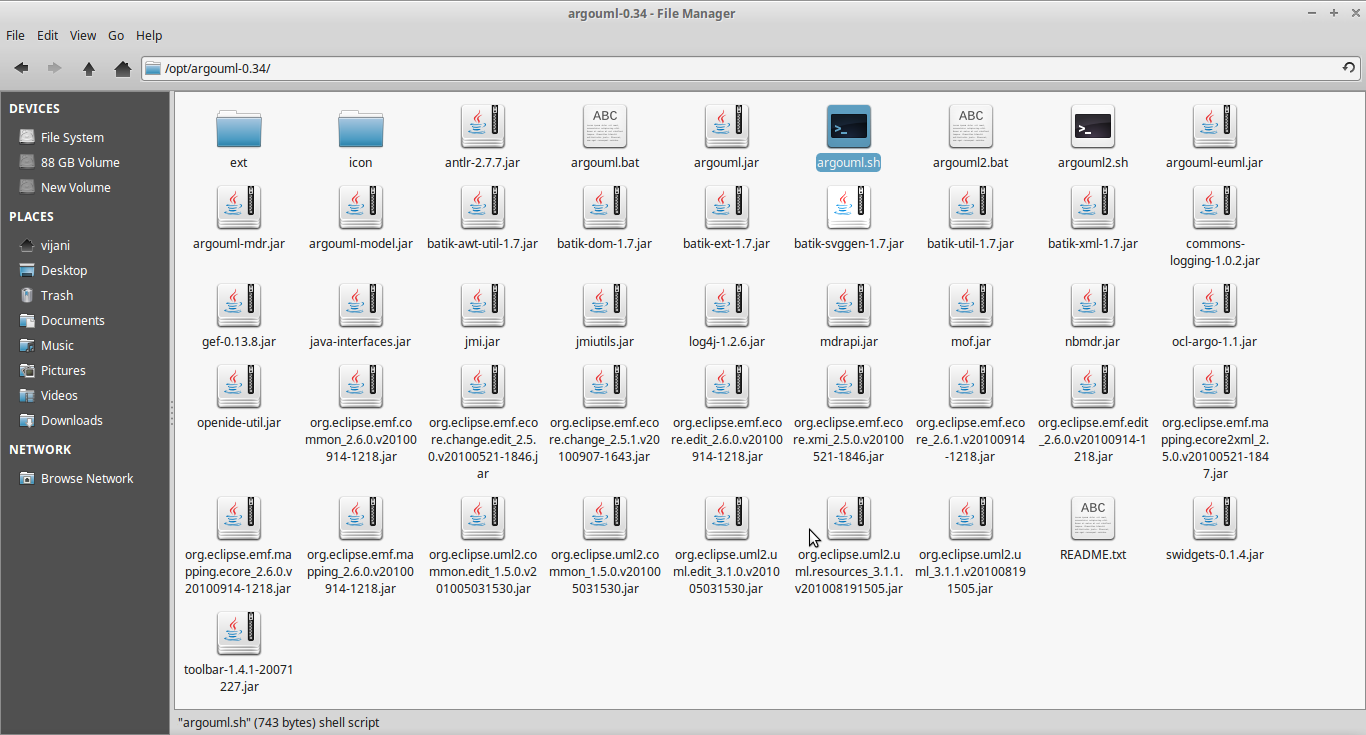
There is a file argouml.sh in folder /opt/argouml-0.34/argouml.sh
(.sh file is a shell script which you can execute in a terminal. (like .exe in windows))
Open terminal inside folder /opt/argouml-0.34/argouml.sh
Give command ./argouml.sh to open ArgoUML
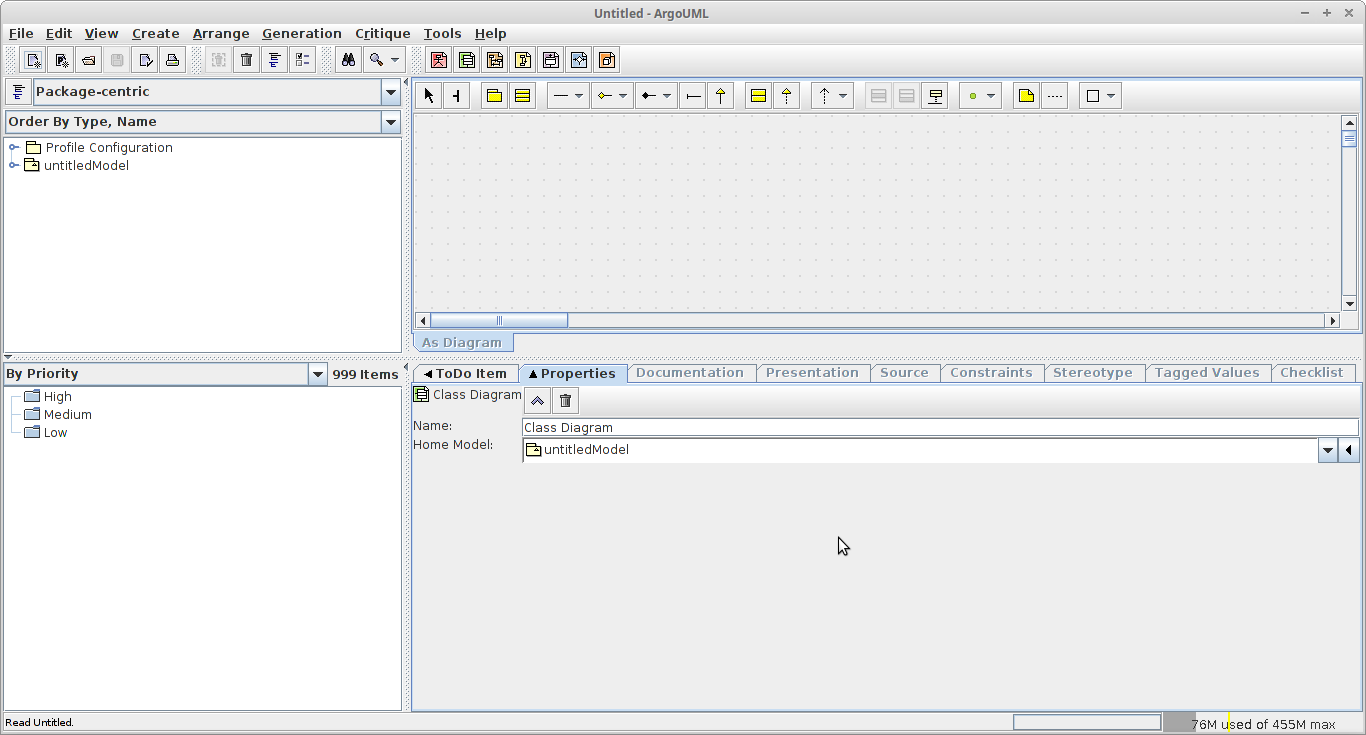
Familiar with above window? That is ArgoUML where you can design any UML diagram using tools in this. You should use ArgoUML to design diagrams for the assignments.
Use the guide given, Moodle->OOD->Practicals->ArgoUML Tutorial.pdf (it has installation guide for Windows OS too. And from Topic 4 onwards it has guidance on how to use ArgoUML)
Practical

Step 1 : Class diagram, entities
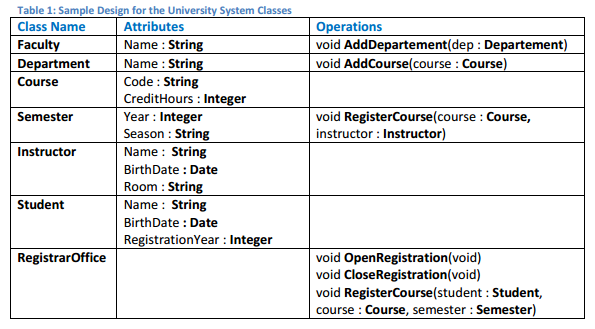
You need to create a class diagram for the University System given.
1 2 3 4 5 6 7
Click on 2nd button (green one) to create a class diagram. The tools for class diagram will be shown below this tool bar.
First, you need to identify the entities to design the diagram which are already given here.
Let’s draw entities on our designing area of ArgoUML (shown as 2 in ArgoUML Tutorial.pdf)
1 2 3 4 5 6 7 8 9 10 11 12 13 14 15 16 17 18 19
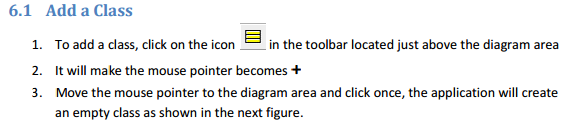
Click on button 4 , and draw an entity, type it’s name, see the following:

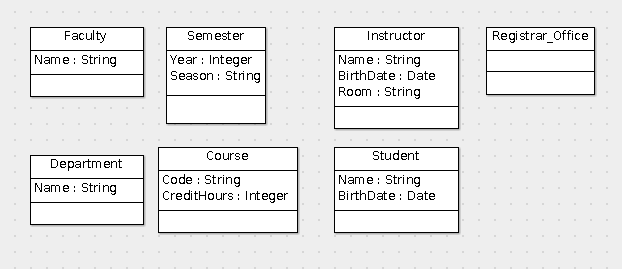
Now we created all our entities/classes:

Step 2 : adding Attributes

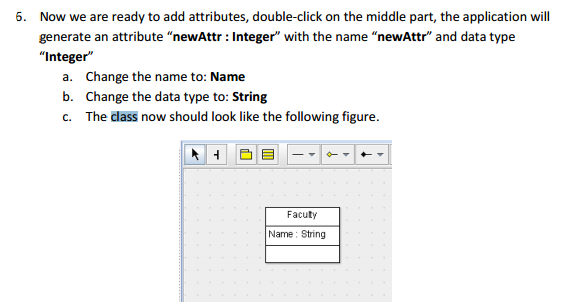

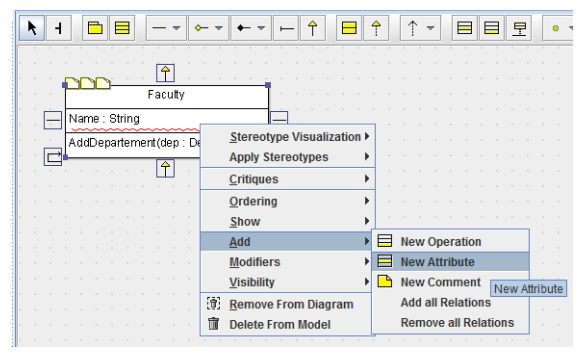
Or you can add attributes using the + symbol. It will appear when you selected an entity/class.
Now we added attributes to our entities/classes
Step 3 : adding functions/operations


Or you can add operations using the + symbol. It will appear when you selected an entity/class.
Now we added operations to our entities/classes

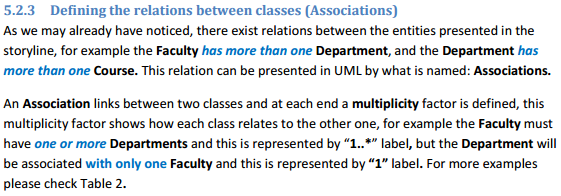
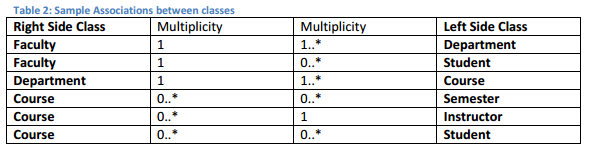
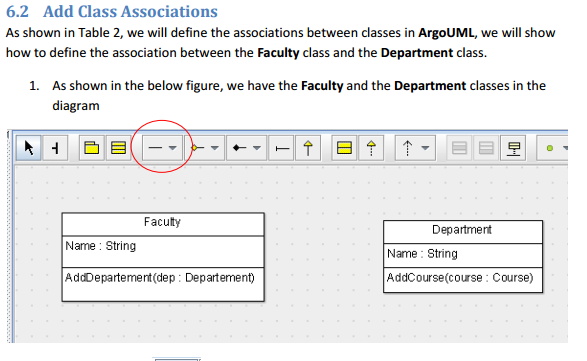
Step 4 : add class associations
1 2 3 4 5 6 7 8 9 10 11 12 13 14 15 16 17 18 19
Select “New Association” from 5 drop down, in tool bar.


- Can drag and drop or re-arrange elements on your drawing area as you want to have an outcome in good order.
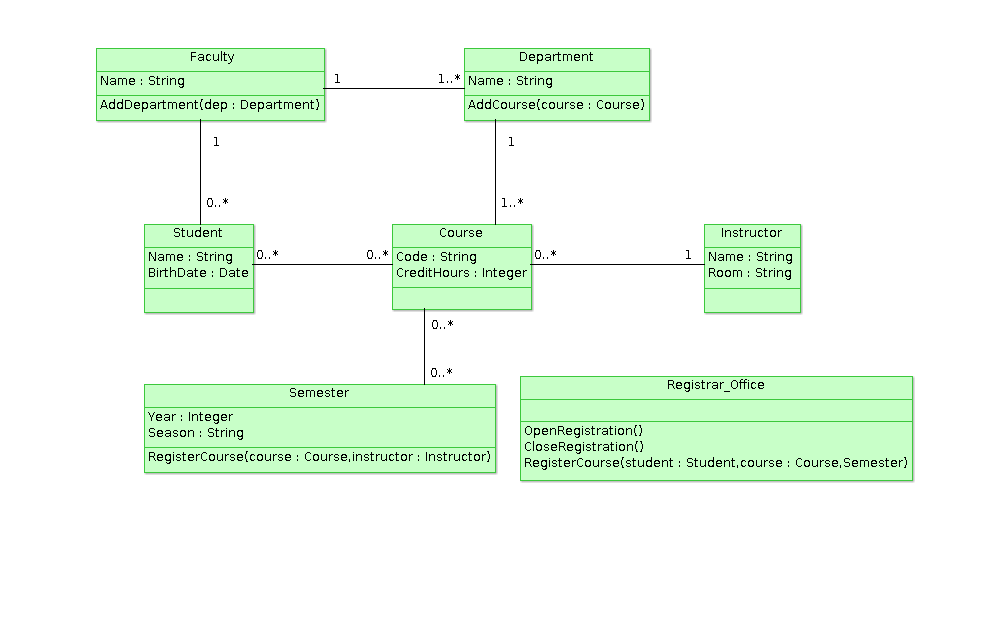
- Can add colors as you like : use light colors.
- Can download your diagram as an image. File-> Export graphics
- Use pdf format when you submit your assignments (add downloaded diagram as an image into the pdf)
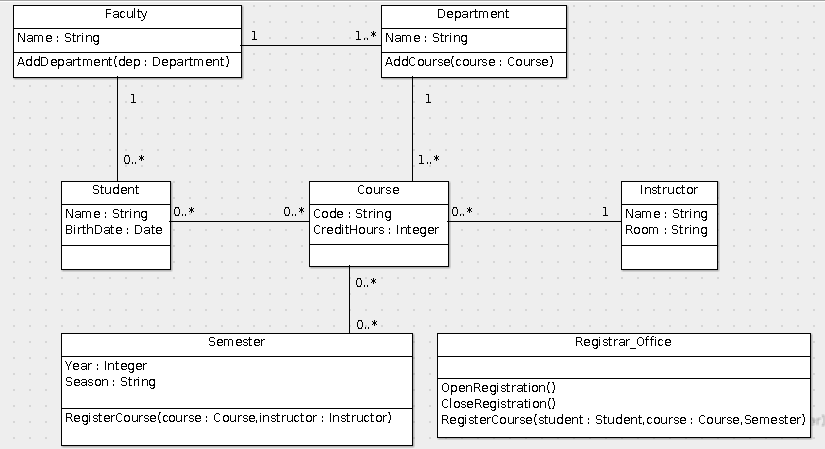
After adding all associations given;
Select an element, go to Presentation tab, in Lower Right of the screen, where the Details of the selected object are displayed.
Can change Colors:
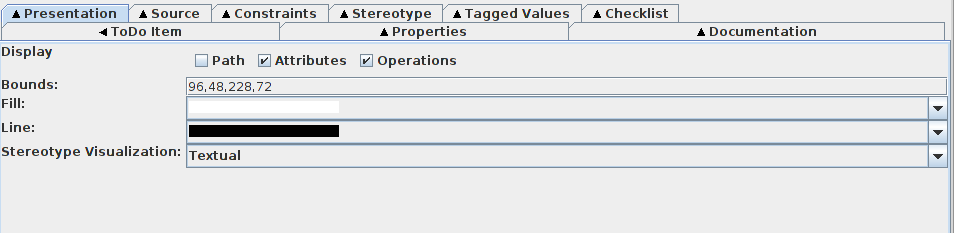
Can see the source code of selected element:


How to download source code of the diagram :


No comments:
Post a Comment